#Product Trends
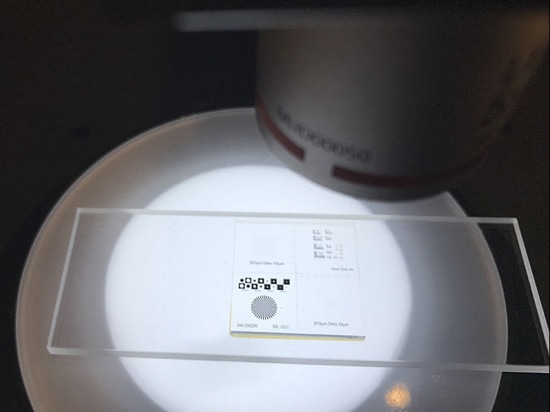
Microscope Calibration with Opto's target with 1.000 line pairs per millimeter
Calibration of any optical system with Opto's calibration target
Since each microscope has a different lens, screen or camera, it is necessary to make a comparison to a standard. In order to perform a calibration or machine capability analysis for these high-precision measurements, appropriate reticles, dials, test plates or calibration plates are required.
Common USAF test targets end at a frequency of approx. 250 line pairs per millimeter, i.e. 2µm per line in terms of resolution. Also other scales available on the market have mostly only structure widths of several micrometers. Opto's new calibration standard with its 1,000 line pairs per mm (0.5µm) and the integrated Siemens star with tip geometries of 500nm is therefore very far ahead.
Distortion error in image field
Particularly in the manufacture of microsystems, the highest demands are placed on process control in the µ range. In addition to resolution, distortion and the calibration of absolute lengths are also critical specifications that are often required.
The calibration target contains point grids with diameters of 10 and 20 µm, respectively, which have been specially developed for microscopy and industrial image processing and are suitable for determining distortion errors in the image field. This allows image analysis systems to be adjusted and corrected. Contrast patterns are also applied with inverse structures in different sizes. The 20mm long integrated scale with 10µm steps is optimal for the calibration of measuring instruments. During production, great importance was attached to maximum reflection and high-resolution flanks (light-dark transitions). All optical parameters of a microscope and image analysis system can be measured and calibrated with a single calibration plate. The calibration plates are optionally supplied with a DKD certificate in order to be able to prove the measuring capability according to DIN ISO. Individual distances or diameters are measured and documented according to standards by certified institutes and are therefore suitable for proving the measuring capability of systems. Mounted on microscope carriers of the standard size of 76x26x4.5mm, they can be easily held and transported and used with common microscopes or measuring instruments.
Particle standard for residual dirt analysis
In addition to the requirements for dimensional accuracy, the verification of algorithms is increasingly required. For example, the residual dirt analysis requires how long a fiber is. The problem here is that a camera only sees a curved black line on a background that is unfortunately not always white. So how does the software know to stretch the fiber before it misses from start to finish? Or when two fibers lie on top of each other. Where does one end and the other begin? These are simple examples, which become even more complex and diverse, especially with hardly predictable samples. Therefore, a particle standard was developed to which clearly defined shapes and pattern particles were applied on a field of 50x50mm. The particle target has become the standard in this market. It can be used to compare the performance of different systems as well as a calibration standard for your own device. Both targets are supplied in a protective cover made of precious wood, in which they can be conveniently transported and stored.
Author
Markus Riedi, CEO, Opto GmbH


